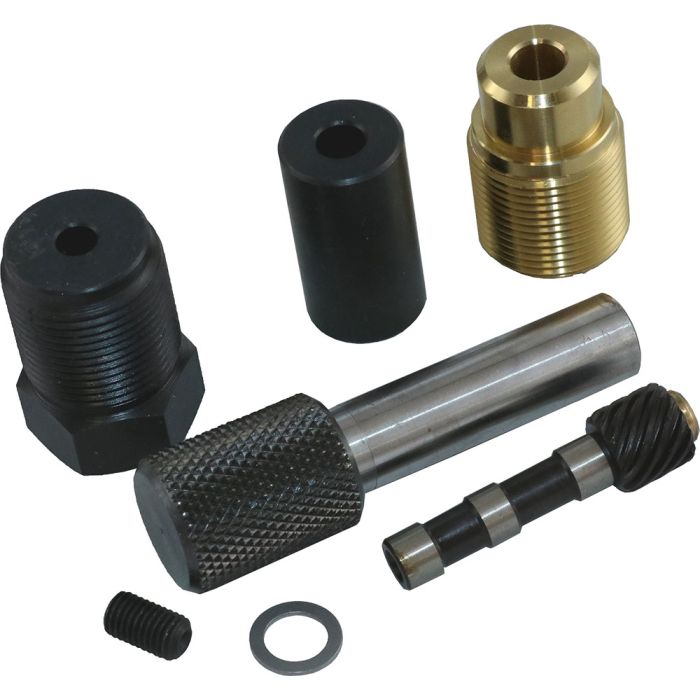
1962-1974 Corvette Tach Drive Distributor Gear & Set Screw Installation Kit, w/Bushing Installation Tool
Fitment
Product Details
- Designed to reduce wear from drive gear movement
- Replace internal button
- Includes cross gear (improved model), coupling, thrush washer, set screw, thread guide tool and tap guide tools
- Includes bushing installaltion tool
This installation kit is used to install the set screw to replace the plastic button inside the distributor. You will drill a hole in the housing using the tools and tap the hole for the set screw. The new screw will allow you to adjust play on cross gear to the main shaft.
Installation Instrucitons:
Distributor shaft must be removed before completing this modificaiton.
1. Insert the drill guide tool into the coupling threaded hole. Do so and tighten down snuggly with 7/8” wrench.
2. Insert 13/64 drill into guide until it bottoms out against the housing. Apply oil to bit and drill hole in the housing.
3. Remove drill guide and insert tap guide, using the same procedure. Insert 1/4- 28 N.F. tap, and tap hole in housing. These guide tools are hardened steel and can be used over and over again.
4. Clean out all cavities of housing with solvent, and dry.
5. Complete the assembly of the distributor.
6. When ready install drive gear and coupling, apply a liberal amount of high temperature grease in the grease grooves of your tach drive gear shaft, then insert shaft in I.D. of coupling.
7. Screw coupling in distributor housing (use a little Loc-Tite on coupling), after placing liberal amount of lightweight grease into cavity. This grease aids in lubricating gears until engine oil can reach gears and protect them.
8. Take the enclosed set screw, and screw it into the newly tapped hole until all end-play is removed from gear shaft, then back-off approximately ¼-1 turn. Check to make sure the distributor shaft turns freely, if not adjust the set screws and coupling until the shaft will move freely in both directions. Putting on a small amount of Loc-Tite will prevent screw from backing off.
NOTE: Delco started using a nylon thrust button in 1968 on some 427 equipped and other special high performance cars. In 1969 and 1970 350 engines and all 1971-74 cars had a nylon button inserted in the hole in the opposite end of the tach driven gear in the housing to limit it’s end play. This button was okay, but did not totally prevent end play; the centering hole in the end of the gear would wear right into the nylon and then start wearing on the cast distributor housing.
1962-1974 (C1, C2, C3) Tach Drive Distributor Improved Gear Installation Kit
WARNING This product can expose you to chemicals including Cadmium which is known to the State of California to cause cancer on birth defects or other reproductive harm. For more information, visit www.p65warnings.ca.gov
| Base Part Number | 164145 |
|---|---|
| Alt. # | 49056 |
| Brand | N/A |
| Make / Model | Series | Body | Notes | Year |
|---|---|---|---|---|
| Make / Model Chevrolet Corvette | Series | Body | Notes | Year 1962, 1963, 1964, 1965, 1966, 1967, 1968, 1969, 1970, 1971, 1972, 1973, 1974 |
| Make / Model Chevrolet Corvette Standard | Series | Body | Notes Convertible | Year 1962 |
| Make / Model Chevrolet Corvette Stingray | Series | Body | Notes Sting Ray Convertible | Year 1963, 1964, 1965, 1966, 1967, 1968, 1969, 1970, 1971, 1972, 1973, 1974 |
| Make / Model Chevrolet Corvette Stingray | Series | Body | Notes Sting Ray Sports Coupe | Year 1963, 1964, 1965, 1966, 1967, 1968, 1969, 1970, 1971, 1972, 1973, 1974 |


