


1955-57 HEADLIGHT BUCKET RESTORATION
The headlight buckets are completely unglamorous items that just have to be there and hold the headlights in place. But, if one of the components in the buckets fails you are in trouble. The result is unadjustable or wiggly headlights that may point to the sky on one side and down at the bumper on the other. Each bucket has two adjusting screws and a spring that is used to adjust the headlight. In this article we will rebuild an original headlight bucket, which can be done with simple hand tools. It sure is gratifying to bring an old original part back to life!
Parts List
57-142258-1 1955 Tubular Radiator Core Support
57-130827-1 1955-56 Headlight Bucket Seals
57-130864-1 1957 Chevy Headlight Bucket Seals to seal headlight bucket
57-134568-1 1955-57 Headlight Sub-Body With Stainless Steel Trim Ring
Semi Gloss Black Spray Paint
Tools Needed:
Hammer
Grinder
Punch
Phillips Screwdriver
3/8" Wrench
Time Frame:
2 Hours
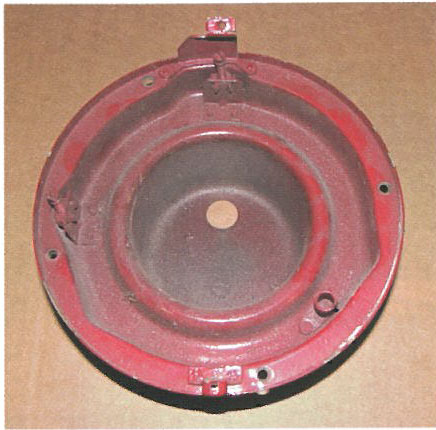
Image #1: The bucket has two adjuster screws and a coil spring that attaches to the sub bucket both to hold it in place and for adjustment. Many times the nylon blocks on the adjusters strip out or break off and the hook on the spring will break.
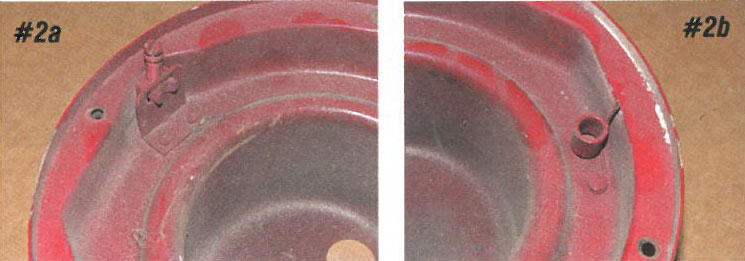
Image #2: The adjuster blocks are held to the bucket with a bracket that is riveted in place, while the spring is riveted directly to the bucket.
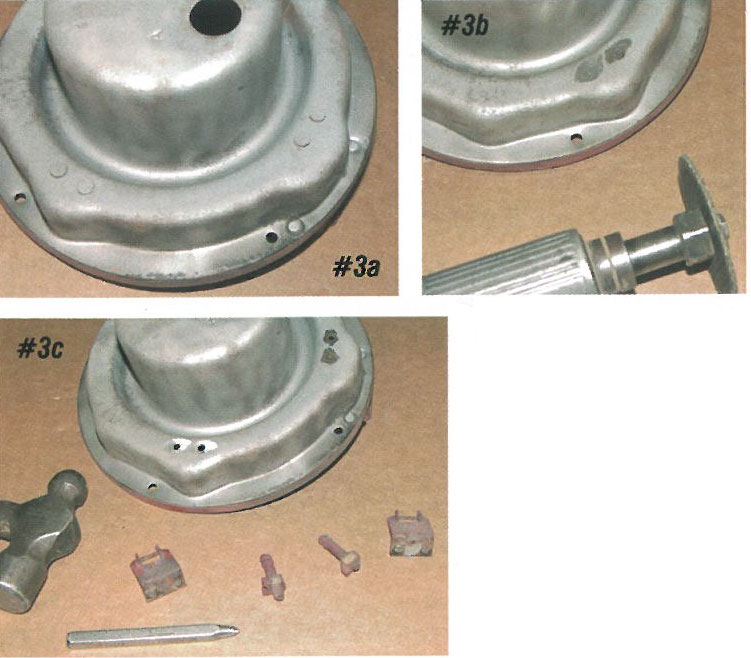
Image #3: Using a grinder from the backside of the bucket, grind the heads off the rivets that secure the adjuster blocks. Using a hammer and punch, drive the rivets out.
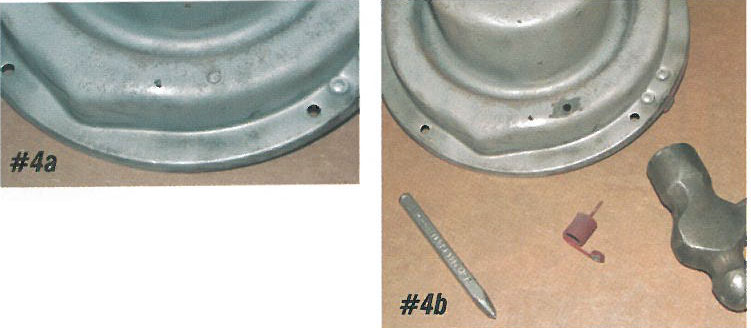
Image #4: Using the grinder, grind off the head of the rivet for the sub bucket spring and drive the rivet out.
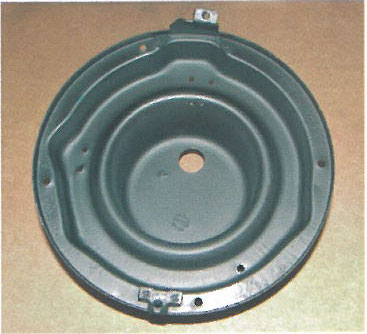
Image #5: With everything removed, clean the bucket and paint it chassis/semi gloss black PIN 49-344.
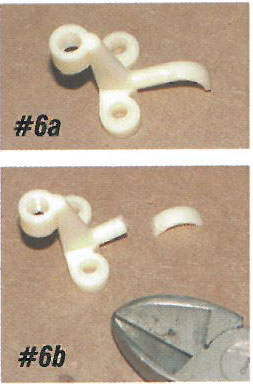
Image #6: The replacement adjuster brackets included in kit PIN 57-135366-1 are made of nylon and attach to the headlight bucket using the supplied hardware. There is a tail on the replacement bracket that must be removed for this application. Using a pair of side cutters, remove half of the tail.
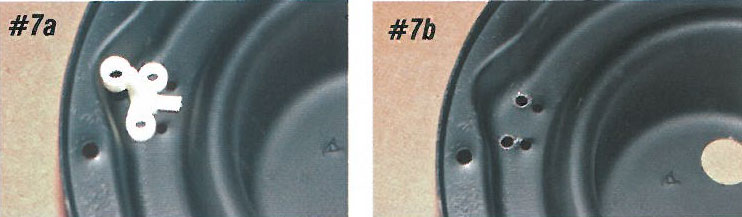
Image #7: New holes must be drilled for the new adjuster brackets. Using the original holes as a guide, line up the new bracket to the outside of the original holes and mark the bucket where the new holes need to be drilled . Drill two 3/16" holes for the new mounting hardware
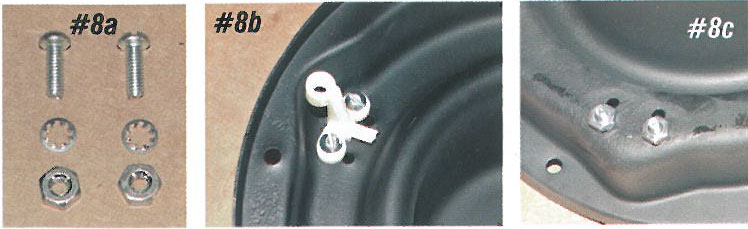
Image #8: The new adjuster brackets are attached to the bucket with two #10-32 X 3/4" machine screws, serrated washers and nuts supplied with the kit.
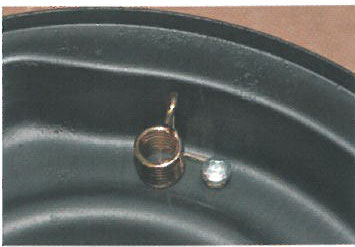
Image #9: The new spring is held to the bucket with a #8 sheet metal screw, also supplied.
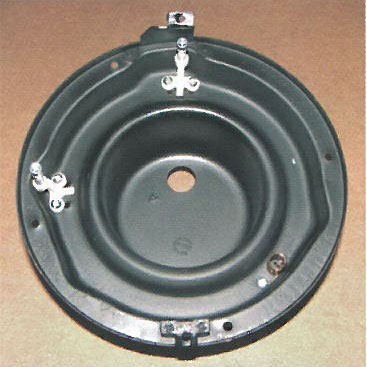
Image #10: The refurbished bucket is now ready to go back in the car. It's always fun to take a damaged original part and with a little time and money bring it back to something that will last another 50 years!
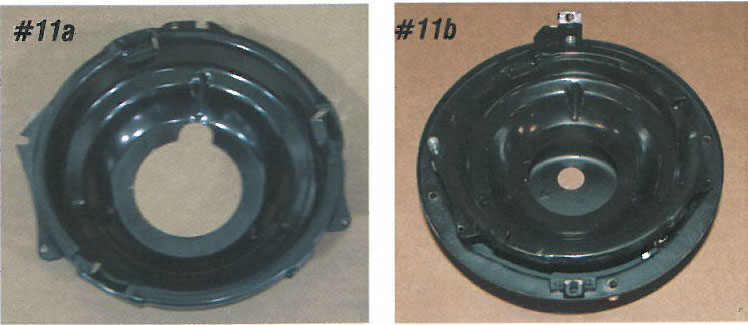
Image #11: The original sub bucket has two ears that will key into the grooves on the adjuster screws. If your sub buckets and rings need to be replaced, order PIN 57-134568-1.
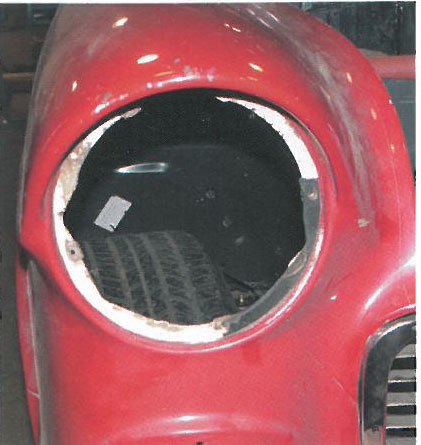
Image #12: A flat rubber seal fits between the headlight bucket and the front fender. When you removed the bucket from the fender, the seal was probably not there or was dried up and broken. We will replace these seals.
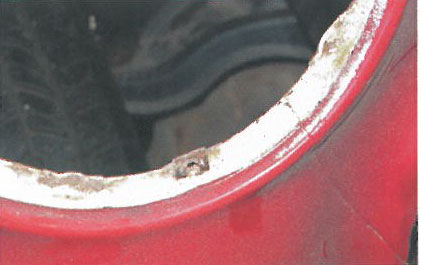
Image #13: There are four]-nuts at the front opening of the fender for the headlight bucket retaining screws. These new nuts are supplied with the hardware kit.
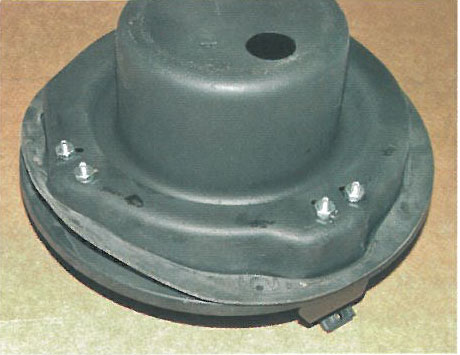
Image #14: The headlight bucket seals PIN 57-130827-1 for 1955-56 and PIN 57-130864-1 for 1957 will match the contour of the bucket and fit between the bucket and fender.
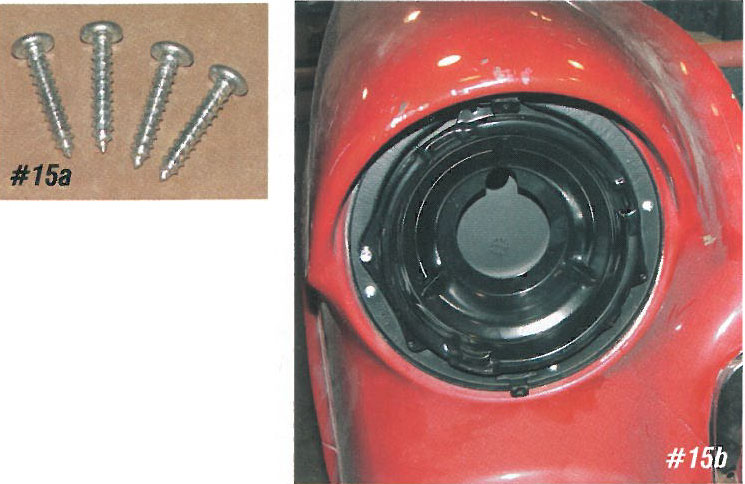
Image #15: Four #10 sheet metal screws are supplied to hold the bucket to the front fenders. These screws fit into the new J-nuts on the fenders.
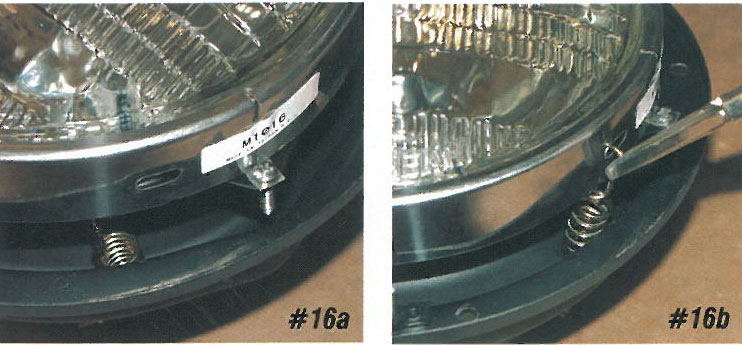
Image #16: The trim ring for the headlight is held to the sub bucket with three small sheet metal screws. Key the headlight and sub bucket assembly into the new adjuster I screws and snap the spring into the hole in the ring using needle nose pliers.
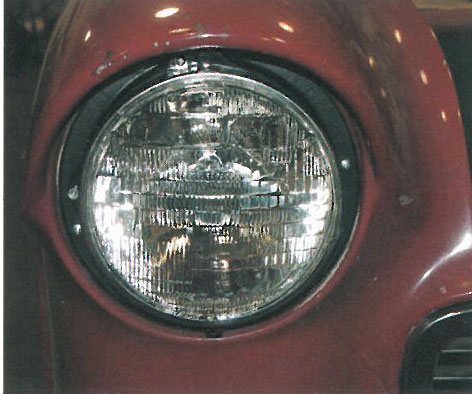
Image #17: With the new adjusters it will be a breeze to properly adjust the headlights.
Mar. 2008